- Author
- Timo Bingmann (2013)
Prerequisites:
Unpack STXXL source code
Use CMake to Generate Visual Studio Projects
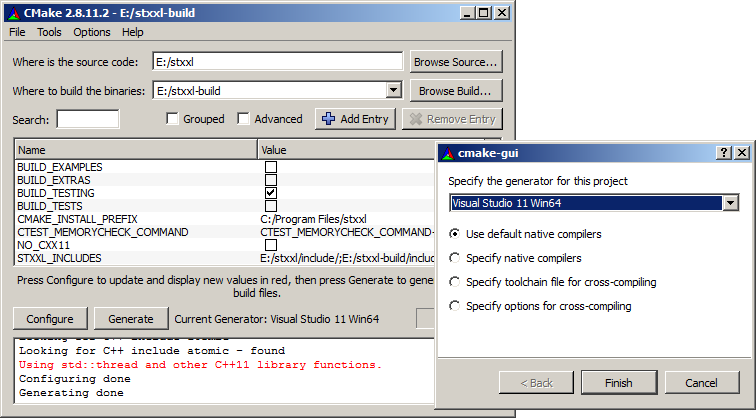
- Open the CMake GUI.
- Fill in the source code field with the place of the STXXL source and pick a build directory.
- Pressing "Configure" brings up a dialog box: select your Visual Studio version (MSVC 11 here).
Note that you must select between 32- and 64-bit building here.
- Press "Generate" to run the CMake platform checks and to generate the Visual Studio project files.
- After generating the project, CMake presents a list of optional configuration switches. Maybe the most important are
BUILD_TESTS and BUILD_EXAMPLES. By selecting them, additional subprojects are generated to build and run the unit tests for STXXL.
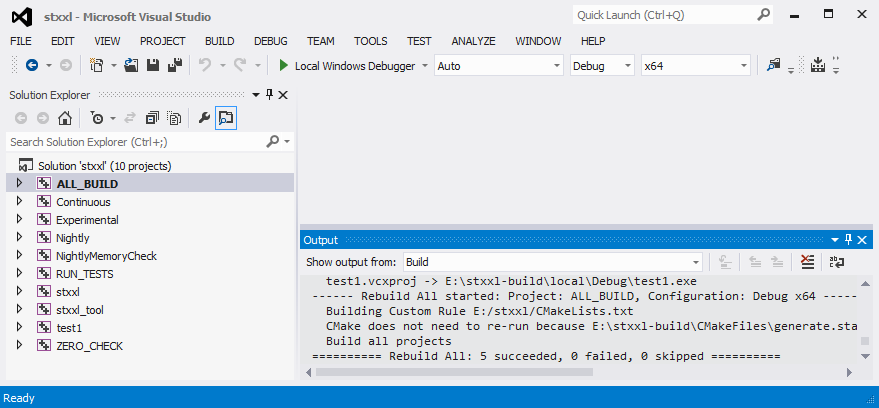
Use Visual Studio to Build STXXL
- Afterwards, use Visual Studio to open the stxxl.sln STXXL "Solution" containing the projects.
- Building the ALL_BUILD will first compile the STXXL library sources and then stxxl_tool and the test1 program in
local/
- You can immediately start working with STXXL by modifying the test1.cpp code in the
local/ directory.
- Simply switch Visual Studio into Release mode for building without assertions and extra checks.
- To build the examples and test suite open up CMake, enable the check-boxes
BUILD_EXAMPLES or BUILD_EXAMPLES and press "Generate" again. This will create many sub-projects in the Visual Studio solution.
- Note
- For instruction on configuring disks on Windows, see Disk Configuration Files
Using STXXL as a Library inside a Project
TODO. If you are an experienced MSVC user, please contribute!
 1.8.5
1.8.5 
